Cosmetics and fashion storage tips

8 comments
am such a organized person, that I even like to have my makeup in its packaging if its that pretty. When it comes to storing my fave fashion pieces and cosmetics I wanted something clean and easy to work with.

Since being into fashion and makeup I would opt for organizing storages from IKEA because it was the best option in terms of value for money, how easy it was to get at a really good price. I believe that you dont have to spend so much money to get storage items such as makeup organizers and wardrobe space savers.

I used a mix of clear storage cases and other organizers such as the SKUBB collection. These clear storage cases are perfect for any vanity and I find it so easy to find the makeup Im looking for. Its clean and organized. I am hoping to help a lot of you girls with some storage tips so heres my top picks from IKEA for storing and organizing:

GODMORGON Series
This is a clear 3 story organizer that doesnt take up too much space. I like to organize my bronzers, blushs and shadow palettes in this. Neat and tidy looking!

SKUBB Series
White square thats has 7 compartments, not too big and fits in drawers! I keep my packaged makeup in here and I love how flexible it is. You can fold it away too. I have two of these but IKEA has them in so many different sizes and colors too!


I hang this on my clothing rail, I like to fill it up with packaged makeup, palettes, liners, but in organized rows. Easily accessible!

Shoe Storage
I like that I can see my shoes!, I keep these under my clothing rail because its not messy, such a more convenient and tidier way to store my shoes. I prefer this to shoe racks because they dont catch dust.


I hope this post helped a lot of you guys, as you can tell I love the convenience of the pieces I have because they are easy accessible and dont make my room look cluttered. Light weight, flexible, neat and pretty looking – my kinda style.

Happy organizing – 


SHARE:
8 comments

BB creams - the best ones and why

1 comment
BB creams were something I never understood, why would I want to use something thats not full coverage? my perception of BB creams has changed this past year. I started using them this summer and I have been hooked since and here's why...

What's BB cream?
BB cream is a blemish balm that is meant to even complexion and help blemishes fade. It is made to replace foundation, primers, serums and sunblock.

If you don't feel ready to where something light weight I recommend you use a solid concealer on imperfections before applying your BB cream. Applying a solid concealer first wont move as it dries onto the skin so when you apply your bb cream it will glide on smoothly. Best way to use BB creams is with a damp beauty sponge or hands.

My top picks

1) Dior Dream Skin
This is actually a skin cushion but I found it felt so much like a BB cream and has the same benefits. I have worn this to the gym too. love the application and the feel of it on the skin. Sheer in coverage but made to even complexion. SPF 50.

2) Garnier BB Cream
The first BB cream I tried and it was by mistake! I got this thinking it was a tinted moisturiser. I needed a new one because I had just got a spray tan. When i applied it on my face i was confused as to how it was so smooth on my face and the scent was so fresh. It gave me a mannequin-like effect (in a good poreless way) SPF 50


3) MISSHA M Perfect cover BB Cream
A bb cream i had never heard of but it changed the game for me. I was introduced to this by a client who was convincing me to switch to BB creams. She told me how she discovered this brand and she is in love with it. She always stocked up and gifted me one to try and I have not been disappointed. such a great "no make up makeup" effect that people at 7am breakfast meetings have complimented how "naturally" flawless i look in the morning, haha! Comes in a tube/pump. SPF 42


4) Guerlain METEORITES Baby Glow
The fresh scent! The BABY GLOW! The packaging! Such a lovely dewy effect, when applied with fingers it looks like your skin is FLAW-LESS! It gives a very pretty sheen to the skin so it's great for oily skin too. SPF25


5) L'oreal GG glam bronze
Not a bb cream but gives the same feeling. you get a gorgeous sun kissed jlo glow, minimizes the look of pores so it looks like you have a filter. Use with a damp sponge and your faVe concealer, it is my every day go to! Great for dry skin. SPF 25.


I highly recommend you guys ditch foundations for everyday and switch to BB creams. They are so much better and are better for your skin. Leave the full coverage for occasions, it will be a better difference too when you want to look more glam for events. SO for daily use, pick a BB cream!

F x
SHARE:
1 comments

Brows that Wow #PrestigeBeauty

1 comment
Brows are a major staple of a Middle Eastern woman’s beauty regimen and now that thick brows are vital in the fashion world too – picture the perfectly sculpted brows of Cara Delevinge and Diala Makki – we can use our time-honoured tips and tricks to initiate those less experienced into effortlessly creating a thick brow that’s clean and fabulous.

PENCILS 
Eyebrow pencils are great go-tos for changing your brow shape, amplifying thin brows. Try Estée Lauder’s Brow Now Brow Defining Pencil to give your brows more definition. To really work a strong brow, try Tom Ford Brow Sculptor, angled filler. It’s easier for beginners because the ‘calligraphy’ end of the pencil allows you to have more control, plus the shade choices are great. The brow comb allows you to brush the hair into place as you fill, keeping the shape natural.

GLOSS
The aim is to keep the brows looking tidy but strong, and to frame the eyes with a full arch. Smashbox’s Brow Tech Gloss Stick is perfect for over-plucked brows. The pencil has a delicate retractable point to create the illusion of natural hair strokes. Make sure your product’s colour has a cool tone, to mimic natural hair.

GELS
Those who already have bold brows can opt for an eyebrow gel, which is used to simply set the brow shape, add a hint of colour, and manage unruly hairs one swipe at a time. This is an effortless process with Bobbi Brown’s new Long-Wear brow gel paired with the their two-in one brush tool. With a huge color palette, it’s even easier to find that perfect match for natural looking brows. Estee Lauder’s Brow Volumizing brow tint and Stay in Place brow gel are the perfect duo to bold brows all day long.

POWDER 
If you lack the steady hand necessary for sculpting an ultra-precise shape, select a powder formula instead to gradually build up colour and volume. Tom Ford’s Brow Sculpting Kit features two blendable shades to create a personalised, natural-looking hue. Finish with a colourless wax which sets the brow shape and gives a polished look. If you're lacking time but still want a glamorous look, the new More Than Brow from The Estee Edit, which helps you get dramatic brows, a smoky eye or a soft shading on the lids all the in the same pencil!

Top Tip While in town, why not pop into Selfridge’s (London) and visit Bobbi Brown’s exclusive Brow How and enjoy expert tips through a one-to-one Makeup Lesson to help you create, enhance or change your brow shape using a multitude of products. Lessons can be booked for RRP £17 redeemable against products on the day of the lesson
SHARE:
1 comments

Peachy makeup look for Olive skin featuring BUFFING TECHNIQUE

4 comments
I recently created this peachy glow look for a shoot. I was happy with the overall look so decided to write about it on the blog as it's perfect for girls with medium/olive skin tone.


The main tip for a summer makeup look is to use the right primer and less foundation. regardless of your skin type. Adding layers of foundation could end up making acne marks or bumps more prominent. You want to use concealer for the covering and the buffing technique is whats seals the deal with this summer look that will last you all day and night!

Skin prep
- Charlotte Tilbury Magic Cream
-Giorgio Armani master fluid primer - This primer doesn't have the typical chalky feeling that most mattifying primers have. It has a silky skin like feeling that allows your foundation to glide on and blend perfectly.

Acne scars and colour correcting
For redness from pimples and skin I use a green corrector because it has something to stick to (primer)
pressing it into the skin rather than rubbing it. If there is discoloration (under eye circles) or uneven skin around the mouth add a orange tone corrector.


Foundation & Concealer
I used a light layer of Makeup Forever foundation blending it with a beauty blender slightly dabbing so i do not disturb the colour correcting under it.
For under eye concealer I used Charlotte Tilbury retoucher concealer and set with a loose translucent MAC powder.

Sculpting the face
I used Sleek cosmetics cream contour to define nose and cheekbones, blending with a beauty blender until naturally blended into the skin. 
I used a cream Sleek highlighter on top of powder by blending it with my fingers gently. 
Also adding this cream highlighter down the nose and on cupids bow

Eyes
on the eyes I like to use creams.YSL metallic cream in number 4 as the base and Golden goddess eyeshadow palette by Charlotte Tilbury. 
Mac Zoom lash mascara

Setting contour and buffing technique
I used Rodial Contour powder in number 3 to set cream contour
Style Blusher by MAC
To set and buff everything I used MAC mineralise skin finish natural in medium with a big brush starting down from the neck working my way upwards in circular morion blending everything and going over everything except eyes. This technique sets everything and helps even set the glow. 
Makeup takes around an hour to set and this technique is what helps your makeup last until you decide to take it off.

Lips:
Mufe 2c liner with Nude Kate lip stick by Charlotte Tilbury topping it with L'Oreal Nude Ballet gloss.

Like an every day filter.

SHARE:
4 comments

My skin care by Fyza

8 comments
Growing up with acne was probably the most difficult things I had to deal with. It had nothing to do with my diet. I had a horrible habit of touching my skin and popping pimples! Your hands carry so much bacteria that the acne starts to spread.

I have tried so much products for my skin but never wanted to take the route of pills because i'm honestly scared of the side affects I have seen from my friends. Step one was to quit drinking any type of fizzy drinks, especially Coke! Water only and then to stop touching my skin. I noticed that every time I went to London I would get the worst breakouts on my cheeks, cystic acne! the water in London is so harsh compared to here in the UAE. My skin would always calm down when I came back to the Middle East and my makeup would apply so much smoother.

I'm going to list what helped clear my scars and acne. I'm really into all natural products, I try my best to use naturally made remedies now and then.

First and foremost you should ALWAYS remove your makeup no matter how tired you are! Not only with a makeup removing wipe but actually wash your face with a cleanser. I started doing this and i would dry my face with a paper towel rather than a face towel.

I remove my makeup with Ritual essentials wow by wojooh makeup remover using a cotton pad to remove all traces.

I then use Dermologica facial wash followed by Lush Cosmetics angels on bare skin to gently exfoliate my face. This is a dry product that you make into a paste and make it the consistency you prefer. This really helped with fading existing scars.

After this step I press a paper towel gently on my face to dry it. For two days a week I would use the Glam Glow clearing mud treatment. focusing on my pores and pimples. I would wash this off and dry my face.

Rose water is your best friend!!!!! I poured rose water into a spray bottle and sprayed it onto a cotton pad and applied it all over my face.

That is basically my night routine and I can honestly say I saw results within 4 days. I knew about Glam Glow for a long time but only properly started using it when I found out how it is made and what the key benefits were. It's a treatment with allows you to use it as many times as you wish per week.

For moisturizers I go between two. One for day time before makeup is Charlotte tilbury magic cream. For night time I use Origins Zero oil moisturizers. I love the minty cool feeling of this. I have combination skin.

BRIGHTENING SKIN BEFORE APPLYING MAKEUP.

I love quick pre makeup treatments. I use GlamGlow flash mud brightening treatment before applying makeup. I use it around chin and cheeks to brighten the area.

Photos of all products below.

Makeup Remover

Exfoliator

Treatment Mask

I use this every day, helps with Middle East heat too 

Pure Rose water and cotton pads

Moisturiser

Spot and blackhead cream

via snapchat/ brightening mask GlamGlow

Facial Wash

Brightening mask


Yes this is my full skin routine, Always take time out for your skin. I'm not a dermatologist but I know what works for me. I believe you can see results if you're religiously doing a skin care routine. I noticed a huge change from no touching my face and going on a detox of no drinks except water!

I hope this helped you, for more skin care updates and makeup routine videos follow our shared snap chat - SoniaFyza


Love, Fyza
SHARE:
8 comments

Making your makeup last this summer

10 comments
I recently noticed how my makeup started looking better as the day went on since using this tip my sister shared with me. I will be sharing my makeup routine through this blog post with you guys because it has survived this Middle East heat from 10am application through 12am!


A common mistake we all make is not letting our moisturiser or primer sink in before applying our foundation and concealer. I noticed that no matter what primer I used or even when switching moisturisers my base would still oxidise and start separating in certain areas of my face.

From the most expensive primer to a drugstore one they all didn't seem to last in this heat longer than 4 hours. I had my sister do my skin and foundation routine for me and I noticed that day my application was flawless through out the whole day and she used exactly what I did. Below I will list in order.

1)
prepped skin with Charlotte Tilbury Magic Cream

This was left to set for about 60 seconds

2)
Prime skin with YSL touche eclat blur primer
(use with fingers)

Leave for 60 seconds (in this time foundation was being mixed and matched)

3)

Apply Estee Lauder double wear foundation with fingers and the blend with a beauty blender
This application process was around 1 minute long because the more time you spend on your base everything else is quicker and comes together easily.

4)
Apply YSL Neutralizing corrector in apricot bisque for my under eyes, blended with fingers

5)
Using Tom ford concealing pen with the sponge applicator to go over under eyes. Blended with Micro Blender

6)
Using a large powder brush Swirl it into MAC studio fix powder foundation compact and set whole face.

7) in between at a facial mist to keep the skin looking refreshed and not drained looking.

8)
use only powder products for contour, blush and  eye shadow.

9) Contour with Too Faced chocolate bronzer

10) Liquid highlighter to strobe - longer lasting and can be used over powder if you press in using fingers. Benefit Cosmetics Sun Beam.

11) Fill Brows in with brow powder - Smashbox Brow tech shaping powder is amazing for summer heat.

12) Curl lashes and apply waterproof mascara - Christian Dior Dior show waterproof mascara

using a waterproof mascara after lash curlers will help keep the curl.

13) After applying powder blush, buffing technique is used to set the final look.

14) Spray Urban Decay All Nighter spray.

This is my every day makeup and waiting in between applications has helped the lasting power and it doesn't get oily. It's not always about what you are using, it's how you use it.

Hope you all have a glam summer, Sonia x


SHARE:
10 comments

Glowy Skin with Smokey Grey Eyes

1 comment
I think we should ditch the over contouring look, let's focusing on keeping the skin dewy and bringing eyes out!


First things first is prepping your skin. If you want the dewy look it's best to use a glow primer on the high points of the face such as cheek bones and brow bone. Next use a foundation of your choice. I personally like Dior skin nude for the all over glow. Using a Beauty Blender to blend everything together keeps that healthy dewy look. Making sure your Beauty Blender is damp. At this stage you can start contouring if that's what you like, I prefer to use creams as they are much more softer and subtle looking on the skin. I am currently loving the Sleek cream contour kit, it's creamy and the colours are just right in term of tones. The formula of the Sleek contour kit goes perfectly with the foundation choice.

Next you can start concealing under eyes, I like to go between Tarte Creaseless concealer if the under eye circles are more prominent and Charlotte Tilbury retoucher concealer if theres slight eye bags or discolouration. I use a Micro Beauty Blender to blend the concealer out.

Blending your contour
People will tell you mixed things about what's the best way to blend your contour with your foundation. I think it's all to do with personal preference. If someone has more oily skin I like to use a brush to blend in the cream contour with the foundation and if someone is closer to the dryer side I use a beauty blender. This is just my own way of blending, you can try either one and see which worked better for you.

Setting your base
I like to set the whole face with a powder foundation, this may sound scary or too much but it's more to do with the tool and how light handed you are with this. I like to use a big brush to set the face foundation just so the glow is still there and the powder isn't over powering or chalky looking.

Pop of colour
Pink tone's are really pretty at the moment so opt for the pastel tones when choosing a blusher colour.
The brands and colours I usually go for at the moment are Urban Decay blusher in the colour Cherry from the Gwen Steffani collection and L'Oreal Blusher in the colour 145 Rosewood.

Extra glow?
If you can't get enough of your glow then try Nars Illuminator (cream) in Orgasm it adds that extra strobing effect that so many of us crave! Don't worry about using it over powder, gently press on to the skin using your ring finger. It will blend into your blush and dry after a few seconds leaving you with the 'glossy' look.

Eyes
Save time with your eye makeup and use one palette! For grey tones I like 'Rock chick' palette by Charlotte Tilbury. Using the matte grey all over the lid and bottom lash line and the shimmery silver pressed onto the middle of the lid. I like to slightly smudge a black Kohl Pencil by Mac in smoulder and blending it out with a My Kit.co brush. Adding medium individual lashes by Ardell with a coat of Lancome Hypnose mascara on top and bottom.


Best products to achieve this look: (Clickable links!)

I hope you guys enjoyed this post. I love sharing my favourite products as well as mixing brands.


Love, Fyza :)

SHARE:
1 comments

LONDON MAKEUP COURSE - TWO DAYS FINAL ONE.

5 comments
I actually got asked at my last workshop "why did you only pick 10 people? what's the catch?" It made me think, do people think there's a catch? The only reason I do these classes so small is because I get to know the crowd more, it's intimate and the group learn so much more. I answer every question without hesitation and I used the line "there is a difference between passion and greed" I'm not bashing any other artist when I say this though! I just love the vibe of a small crowd we have fun, share makeup secrets and they get to see me live in action, up close and personal.

Manchester was my final stop EVER for the UK. But since last weekend the emails have not stopped about one in London and i thought why not? I want to hold a two day intense hands on course.

Everything from the base to brows gets covered, matching foundation perfectly to the best techniques in achieving flawless under eyes. Then you get to practice it, there's no secrets in beauty which is why I want people to experience this in person. I love putting together goodie bags with all my favourite brands. The feedback I have received has honestly been so motivating. I love meeting you all and I don't want to have to say this but this truly will be my last one as wedding season has started so I will not get the chance.

COURSE DETAILS:

12 STUDENTS
TWO DAYS
16TH AND 17TH APRIL
CENTRAL LONDON
LIVE DEMO
BRING YOUR KIT
-we discuss kit space, advice, best products to take, how to pack a kit
PRACTICE
HANDS ON
SKIN PREP
CONTOUR
HIGHLIGHT
SKIN TYPES
SOCIAL MEDIA ADVICE
STROBING
GOODIE BAG

Spaces are EXTREMELY limited, first come first serve. If you are serious about booking the final two day course by soniaxfyza please contact soniaxfyzacourse@gmail.com with your full name, age, Instagram page, where you will be coming from. Further information will be given in email.

please note i don't deal with these emails.

SHARE:
5 comments

My Lash Growth

2 comments
This post has been in my drafts for so long because I never got the chance to complete it. I don't know if many of you noticed but during August last year I decided to stop wearing false strip lashes. It was way too time consuming when it came to getting ready and I could never find the perfect ones for my eye length.

Naturally my lashes are very fine and I've always had trouble finding the right mascara that would both thicken and add length. I tried rapid lash growth serum and that helped to an extent. I later decided to do some research on some natural ways I could help my lashes grow.


I made a mixture of caster oil and avocado oil, I mixed the two together in a small Muji container. Every evening I would apply the mixture on to my lash line with a small eye liner brush, now I didn't notice a difference instantly it took a while for me to notice, In fact it was other people that would start asking what lashes I'm wearing. You don't usually notice a change when it comes to things like this because you see your own face daily so when someone else notices you know it's working!

5 months later I started using a lash primer by Urban Decay, One coat with Baby Doll Yves Saint Laurent mascara and my lashes looked insane (by the way, I applied the oils on top and bottom lashes.) using a lash curler first helped keep the curl up.

I'm pretty sure this will work for a lot of people which is why I wanted to put it to the test before writing about it. I don't wear any falsies anymore, I sometimes get individual lash extensions in between if I have an event just to give my eyes more drama.


It's worth a try guys, it's safer than the lash growth serums on the market because you know what the ingredients are if you're making your own! It will leave your lashes soft and add thickness.

If you try this please tag us on Instagram and let us know @soniaxfyza

Love, Sonia x


*please note results may vary depending on individual, refer to your GP if you have a reaction.
SHARE:
2 comments

Deeper Skin tones - Our fave picks!

Leave a Comment
I love deeper skin tones! I work with so many types of women and a lot of the time I don't get to take photographs of my work on women with deeper skin tones. There's a few photos on my Instagram but not a lot. I would love to work more with women of colour for photoshoots especially because it's actually one of my strong points. I know the best products out there for you gorgeous medium to dark skin ladies!

I noticed that there was never anything on the market for ethnic skin growing up, when I would go to drugstores the foundation and colour options were very limited. It went from very fair to tan and even the tan seemed off in tone. Luckily now in 2016 we have a lot more brands that cater for ethnic women.

One of the brands that has stood out to me for a long time is a British brand that goes by the name of Sleek Cosmetics, It started off small so only certain people would hear about it. Growing up around beauty and makeup I did hear about it early and saw the brand evolve. I am so in love with this brand because it is MADE for ethnic women. From the rich tones of their shadows the the pigments of their loose shadows!

We heard they are releasing a cream contour kit and we are so excited to tell you all about it. Whether you are a deep skin tone person reading this or a makeup artist you have to check them out. It was quite difficult for me to find a contour powder that was darker than someone that's a nc45/50 (MAC shade)


Sleek Cream Contour in Light


Sleek Makeup is a British Brand as well as Barry M, both have catered so much for ethnic skin tones the past few years and I feel like they haven't had enough recognition considering how great quality their products are and for such a reasonable price, you don't have to break the bank to get a contour palette.

Sleek cream contour kit in Medium

Always remember that contours are meant to be COOL tones, I've explained this in a few blog posts, they mimic the natural shadows of the face. So many Instagram brands that release their contour kits are always too warm and the formulas are drying and hard to blend (trust me i've tried them all and I am very honest with my reviews) I will not hype a brand because it has a huge following and everyone is promoting it, it could be a small brand that Sephora doesn't stock. I'm more about quality over what is over hyped.

Sleek cream contour kit in Dark.

Creamy consistency, easy to blend with a brush or beauty blender, best results over foundation. no need to mix anything with it to help it blend. The colour range goes from fair to dark and comes with a highlight colour. 


Powder contour by Barry M Cosmetics


When I swatched the Dark palette I was in awe! The pigmentation to the tones! insane quality and for the price you are paying. The powders are like butter and blend really well without having to go over and over with a brush to perfect your sculpting.

I really hope these brands are available worldwide, You guys have to try these out to know what i'm talking about. I'm glad that there's brands like this that think about women of colour. We can all be chiseled to perfection with these. Whether your'e a cream or powder girl you can try both because they're super affordable. 

I hope you enjoyed this post and try my recommendation! 

Fyza 


SHARE:
0 comments

SMOKEY KHAKI EYES & DEWY SKIN!

8 comments
I haven't done Sonia's makeup in a while (since 2015!) Just to clear up the confusion again, Sonia is my sister who is my muse as well as a beauty blogger. I'm (Fyza) the Make-Up Artist. So recently I have been experimenting with some new products and brands so you will be in for a treat with the details for this look I created. Usually Sonia goes for the matte look but I went all j-lo glow with this one!

The thing we need to remember about creating a dewy look is that you don't have to have dry skin to pull this off. Anyone can rock it. It is all about the primers you use and how well you set your base. the glow is usually created after with powder highlighters. Here in the Middle East I find girls opt for the matte look because of the weather here. Don't be afraid to change up your style of makeup and experiment to find what works best for you.


Perfect your base.
Products used:
Charlotte Tilbury Magic cream
Smashbox Cosmetics photo finish matte finish primer with a spray of the Smashbox primer spray.
Tom Ford Traceless perfecting foundation in Buff
Applied with a Beauty Blender
Tarte Cosmetics Creaseless concealer in Medium Sand
Benefit Cosmetics Stay Don't Stray eye primer in light

EYES
I created a base for the eyes so the shadow has something to stick too.
Courreges Estee Lauder Eye Glide Pencil in Silver Streak
Blending it with a 217 by MAC
I started by added a crease colour using SMASHBOX Cosmetics Double Exposure Palette 
Matte -Espresso for crease
To deepen the outer crease I used Fig
On the lid I wet my brush and used the colour Mauve 
(This palette transforms shadows when wet!)
I smoked out Noir and Espresso on the lower lash line.
I smudged MAC smoulder eye pencil in her water line and on her lash line I used MAC coffee kohl liner smoked out with a pencil brush.
I used two coats of Giorgio Armani Eyes to kill mascara on top and bottom.


BROWS
Kevyn Aucoin brow pencil
Clear Brow gel

Contour and Highlight
I used a cream contour by a Middle Eastern brand called Wojooh.
They have an amazing cream contour and highlight stick that blends like butter and is the perfect tone.
I blended the contour with a Beauty blender.

SETTING POWDERS & BLUSHER

I used Laura Mericer tranlucent powder to set under eyes
Smashbox cosmetics Crush On Blush Palette - Warm Apricot applied on cheeks
To buff everything out I used MAC mineralise skin finish natural 

GLOW!
to add the glow I used Benefit Cosmetics Sun Beam

LIPS
WOW BY Wojooh lip liner in 230 Woody Pink
with Matte Liquid Lipstick by Wojooh in 230 Sugar Tan


Set with MAC fix+


I enjoyed using all the products, some for the first time! You can be the judge of them from the photo's you see. I listed all products and I hope you enjoyed this post.

Fyza! x


SHARE:
8 comments

Dry Skin & Oily Skin

9 comments
It's been a while guys! I always have these post ideas in my head and I never get a chance to write them out. Sonia and I recently sat down and thought of a list to do in 2016 - writing more for our blog was on that list.

Since this is the first blog post of 2016 I thought I would clear a few things up - There is two of us Fyza is me, writing this lol. I'm the sister that does all the makeovers and live makeup classes. I don't really post any photos of myself mainly because I want the focus to be about my art and not me, I wanted to be the first makeup artist on Instagram that doesn't do makeup on themselves to show off what they can do, rather I would experiment on others so people around the world can see my ability. Women that book me can feel confident and comfortable that I will do a good job on them because I have worked on all typed of people, not just my own skin type.

Sonia models for me, she is basically my muse and she is a beauty addict. She reviews some of the best products out there for you all. We both have different skin and different preferences - complete opposites! I thought this type of post will work well for all skin types of girls.

I will be writing about foundations from different brands that are from full overage to sheer. I hope you enjoy and benefit from this post :)


TOP 3 Full to Medium coverage foundations for Dry Skin

1) Laura Mercier Silk Creme Foundation
The consistency is lovely, I personally love the way it blends and the dewy finish reminds me of a photoshopped beauty shot. It is a gel like consistency so It's nice to blend onto the skin. The colour range is good, love the tones.


2) Tom Ford Traceless Perfecting foundation
The packaging is SO convenient, It's one of those foundations that is easy to pack when travelling. The formula and colour range is perfect. I like to use a beauty blender to blend this out. For more coverage you can use your fingers since they are your best tool. Gives a pretty sheen to the skin.


3) Yves Saint Laurent Le Teint Touche Eclat
This foundation is an old favourite thats crept up into my future, haha. The scent takes me way back to my college days. It has a nice scent to it, creamy texture, light weight and evens out skin very well. When using this foundation your skin will look luminous and healthy, you can build up the coverage. Lasting power is around 12 hours.


Top 3 Full to Medium coverage foundations for Oily Skin

1) Makeup Forever Ultra HD
This is a foundation I have had in my kit for years since majority of my clients have oily to combination skin. The new formula is brilliant, It's been specifically designed for photo's and videos. Who doesn't want photoshopped looking skin in their selfies?! The lasting power on this is probably one of the best things, It doesn't oxidise and works well with either a brush or beauty blender. Oily skin girls best friend but always bare in mind that it also depends on the primer you are using. Try using more of a gel primer with this instead of a liquid one.


2) Estee Lauder Double wear foundation
I've always called this foundation the tattoo foundation, It's been around for so long and I remember a lot of the women in my family using it. Absorbs all the oil well without giving the chalky look to the skin. Coverage is wonderful and It's best used with a Beauty Blender for a flawless finish. Dries matte. The cons of this would probably be that it dries darker like a lot of matte foundations so be sure to pick up some samples before purchasing. Also the glass bottle is a classic but I personally think they should make it more modern and convenient for travel.


3) Clinique Pore Refining Solution Instant foundation

Another foundation I am familiar with while growing up because a lot of the women in my family have oily skin. I would always see this bottle in makeup bags around the house. It gives an even, matte finish that minimises the look of pores. You probably will only need to do a light dusting of powder as it has good staying power. All this depends on how oily you get and the climate you are in. primers are essential with oily skin. Only wish they had more in between shades.


Sheer coverage foundations for Dry skin

1) NARS Sheer Glow
A popular choice, as it gives a nice glow and "no makeup, makeup" finish. It comes in a range of colours and many people have tried and tested this. The only problem I find with this is that it does tends to separate, I find this with a lot of Nars foundations. As long as you prep your skin well first and set your foundation this is a good choice for dry skin.


2) MAC face and body foundation
My fave Mac foundation that is a must have for all makeup artists for their kits. I love the formula and consistency of this, It's a classic one from Mac and you can't go wrong with it. It a great foundation to mix with your full coverage foundations if you want more of a sheer coverage. It's more to even skin out but is build-able. Use with a flat top brush and set with loose powder. Colour range works differently to regular MAC shades so ask for a few samples to try.


3) Laura Mercier Cream Smooth foundation
Hydrating and creamy. If you suffer from dry or very dry skin this is a good choice, it keeps skin plump and smooth. Makes fine lines and wrinkles appear smoother. I would recommend this for mature women. I like to apply this with fingers because the warmth of our hands helps the product sink in better and gives a glowy finish.


Sheer coverage foundations for Oily skin

1) Charlotte Tilbury Magic foundation
You either like this or love it. I love this for every day! The colours are good and the finish is matte and sheer. It doesn't cover pimples but evens skin complexion out. It comes in a glass bottle that is double glazed which I'm not to keen on because this means there's less product so it gives the illusion of more product because the bottle looks thicker. The pump is useful and I like the texture and how it glides on. I would recommend using a synthetic brush to apply this foundation using circular motions. I set this with a pressed powder.


2) L'oreal Nude Magique foundation
Liquid foundation, very watery, sheer and dries matte. Glass bottle, inexpensive, little goes a long way. This foundation feels like nothing on the skin, feather light and I feel like I could breathe. Shake bottle before using and apply with fingers. You can build up the coverage but it's a great every day foundation for work or school. One of my fave drug store brands.


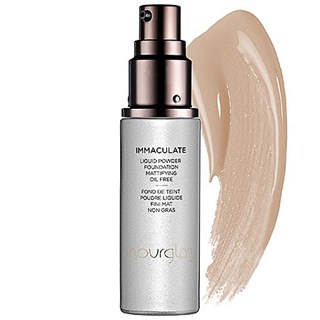
3) Hour Glass Immaculate Liquid To Powder Foundation 
I love this brand and it's packaging. Liquid to matte foundations are a god send for oily skin! This foundation feels light which is what a lot of us want for day time. The only thing we need to remember about these is that they oxidise, so testing them out a couple of times before purchasing is always best. Gives natural coverage, doesn't give a cakey finish and has long staying power. It contains ingredients that prevent breakouts which a lot of us oily skin girls suffer from. Best to mix it with a tinted moisturiser for day time!


We hope this was a good read for you!

Fyza x


SHARE:
9 comments
Next PostNewer Posts Previous PostOlder Posts Home
BLOGGER TEMPLATE BY pipdig